As an Amazon Associate, Oxymeter earns from qualifying purchases.
Somewhere on your first snow slope, the guide will say "axe in the uphill hand" and expect you to already own the right one. Buy the wrong axe and you find out the hard way: too long to swing into a self-arrest, or so aggressive it's useless as a walking stick on a flat glacier.
An ice axe is simpler than crampons. There's no boot-compatibility scale to memorise, no binding to match. But the two mistakes people make — buying too long, and buying too technical — are easy to avoid once you know what the axe is actually for.
So start there. What's the terrain?
The quick answer
For glacier travel, snow slopes, and general alpine routes, you want a classic mountaineering axe: a long, mostly straight shaft you can plant like a walking stick and swing into an arrest. One axe, held in one hand, swapped side to side as you zigzag up.
For steep water ice and mixed climbing, you want a pair of technical tools: short, curved, aggressive picks, swung overhead into vertical ice. Different job, different tool, bought later.
Most people reading this need the first one. If you're climbing your first 4,000-metre peak this summer, a classic axe is the answer, and everything below is about getting the length and build right.
Sizing: shorter than you think
Length is the decision people overthink and still get wrong. Here's the traditional method: stand upright and relaxed, hold the axe head in your palm with your arm hanging at your side, and the spike should hover right around your ankle.
That rule works — but it tends to size you long, and long is out of fashion for good reason. On steeper snow a long axe puts your hand up near your shoulder, which is a weak, tiring position to arrest from. Modern guidance from the BMC leans shorter. The CAI mountaineering manual won't even call the ankle rule a fixed standard: it ties length to your build and, above all, to the ground you'll spend most time on — and it caps general use around 65 cm, past which the axe just turns clumsy.
Almost everyone doing general mountaineering lands between 50 and 65 cm. As a height guide:
| Your height | Suggested length | Notes |
|---|---|---|
| Under 5'6" (168 cm) | ~50–52 cm | Shorter end for steeper routes |
| 5'6" to 6' (168–183 cm) | ~55–60 cm | The most common size sold |
| Over 6' (183 cm+) | ~60–66 cm | Cap at 60 cm if mostly on steep ground |
One more variable: what you'll do with it. Mostly flat glacier walking, where the axe is a third leg? Go longer. Steeper couloirs and firmer snow, where self-arrest and daggering matter? Go shorter. When in doubt, size down. A slightly short axe is a minor annoyance on the flats; a slightly long one is a real handicap when you're trying to stop a slide.
Types: classic, technical, and the hybrid in between
Three broad families, sorted by how curved the shaft is.
Classic / mountaineering. Straight or barely bent shaft, a pick with a gentle "positive" curve that bites well into snow, an adze on the other side for chopping steps. This is the glacier-and-snow axe. Reach-y, forgiving, and the one you learn self-arrest on.
Technical tools. Steeply curved shaft that clears bulges of ice, an aggressive reverse-curve pick, often a hammer instead of an adze. Sold in pairs, used on vertical ground. Overkill — and genuinely worse — for walking up a glacier.
Hybrid / all-mountain. A mild curve that splits the difference: better than a classic axe on the occasional steep pitch, still usable as a walking axe. If you're pretty sure you'll progress onto steeper alpine routes soon, a hybrid is a defensible first buy. For pure glacier season, it's more than you need.
There's also a strength rating worth knowing. Under EN 13089 and the UIAA 152 standard, shafts and picks are stamped Basic ("B", older Type 1) or Technical ("T", older Type 2). The numbers behind the letters: a Basic shaft has to hold 2.5 kN, a Technical one 3.5 kN, and the T test also runs the pick through a fatigue check — pick failure is the usual way an axe breaks. For glacier and snow travel, Basic is fine. The moment you might weight the axe as part of a belay anchor, the CAI manual is blunt: get the T stamp.
Head, pick, and shaft materials
The head is steel on any axe worth owning. Steel holds an edge on ice and rock and survives being driven into frozen ground. The pick does the arresting and the anchoring; the adze chops steps and cuts ledges. On a general axe you want a classic positive-curve pick — it self-arrests more reliably than the aggressive reverse curve on a technical tool. One maintenance note the shops skip: when the pick or spike dulls, touch it up with a hand file only. Powered grinding wheels are out — the CAI manual warns the heat ruins the steel's temper and leaves you with a soft, blunt pick.
The shaft is where weight lives. Aluminium is the standard for classic axes: light, stiff enough, and cheap. Steel and composite shafts appear on technical tools where strength matters more than grams. For a mountaineering axe, aluminium is the right call — a full-length axe still comes in around 400–500 grams, and you'll carry it more than you swing it. One caveat on chasing light, though: the CAI manual puts the balance point in the axe's top third, and that's what makes the head bite when you plant it. Strip too much weight and it stops driving — light is only good as long as the axe still swings true.
The spike at the base needs to be sharp enough to plant in firm snow. Most are. Not much to decide here.
Leashes and tethers
The most debated 30 grams in mountaineering. A leash keeps you from dropping your axe — reassuring, until you're swapping hands at a switchback and it's wrapped around your wrist the wrong way, or you're mid-arrest and there's a loop of cord flapping near your face.
On general glacier and snow work, most experienced alpinists go leashless and just don't drop the thing — roughly the CAI manual's line. On easy ground with constant switchbacks, a wrist leash is more hassle than it's worth: clip the axe to your harness with a thin 6–7 mm cord and an adjustable plate instead. Save the wrist leash for genuinely steep ice, where cinching it down lets the strap take your weight and rests your grip. On committing terrain a dropped axe is a real problem, so that tether earns its keep.
Recommended axe by use
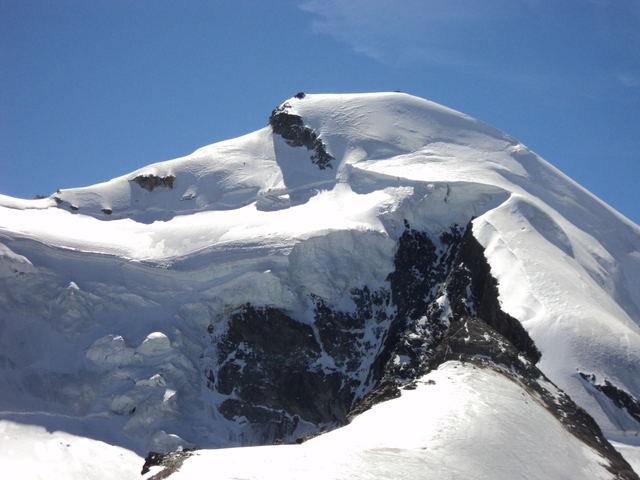
For classic alpinism and 4,000-metre glacier routes — Mont Blanc, Gran Paradiso, the Monte Rosa peaks — a straight-shafted, steel-headed, aluminium-shafted mountaineering axe is the tool. The Black Diamond Raven is the long-standing reference here: a Type 1 classic axe with a positive-curve steel head, an adze, and a light aluminium shaft, sold in 50–75 cm lengths so you can dial in your size. It's the axe guides hand out for a first glacier season, and it does everything a general mountaineer needs — nothing more, which is the point.
For steeper alpine ice and mixed, you'd move to a hybrid or a pair of technical tools with reverse-curve picks and the Type 2 rating. That's a second purchase, made once you know you need it.
Buy for the routes you're climbing this season. The technical tools will still be there when you've earned them.
Monitor your SpO₂ on the way up
Your axe gets you up the snow. Your body still has to deal with the thin air at the top of it. On a 4,000-metre peak the atmosphere holds only around 60% of the oxygen you'd breathe at sea level, and your blood oxygen saturation falls with it.
A pulse oximeter is the cheapest way to watch that happen in real time — a dropping SpO₂ reading is often the first sign of altitude sickness, hours before the headache lands. Check the oxygen level you'll actually face on summit day with the Oxymeter calculator: enter your target altitude and read the O₂ percentage and AMS risk. Then, on the mountain, pair it with a device you trust — see our tested picks in the guide to the best pulse oximeters for hiking. And since you'll want the rest of your metal sorted too, the crampon buyer's guide covers the other half of your glacier kit.
Frequently Asked Questions
What length ice axe do I need?
Most mountaineers want an axe between 50 and 65 cm. A rough height guide: around 52 cm if you're under 5'6", 59 cm if you're 5'6" to 6', and 66 cm if you're taller. Shorter within that range for steeper ground, longer for flat glacier walking. The old "spike reaches your ankle" rule tends to give you an axe that's too long for modern self-arrest.
What is the difference between a mountaineering and a technical ice axe?
A classic mountaineering axe has a long, mostly straight shaft and is used like a walking stick on snow and glaciers, plus for self-arrest. A technical axe (or ice tool) is short, curved, and has an aggressive pick for steep ice and mixed climbing. Under the UIAA 152 standard, technical tools carry a "Type 2" (T) rating and a stronger shaft; classic axes are usually "Type 1" (B).
How do I size an ice axe for my height?
Stand relaxed and upright, hold the axe head in your palm with your arm hanging at your side, and the spike should sit near your ankle. That's the traditional method. Modern practice leans shorter — pick the lower end of the 50–65 cm range if you'll spend time on steeper slopes, since a shorter axe gives more control when you have to self-arrest.
What is a classic ice axe used for?
A classic ice axe handles glacier travel, snow slopes, and self-arrest on general alpine routes up to around 4,000 metres. You use it for balance on the way up, as an anchor on steeper snow, and to stop a slide if you fall. It's the single axe that covers Mont Blanc, Gran Paradiso, and most first 4,000-metre peaks.
Do I need a leash on my ice axe?
Not for general mountaineering. A leash stops you dropping the axe, but it also tangles when you swap hands on switchbacks or during a self-arrest, which is exactly when you don't want extra rope near your face. Many alpinists skip it on glaciers. On steep, exposed ground where a dropped axe means losing it for good, a simple sliding tether is a reasonable compromise.
Ice axe design and strength ratings vary by manufacturer. Check the length and Type rating that match your route, practise self-arrest on a safe slope before you rely on it, and confirm current conditions with the local alpine club or hut before you set out.